Wednesday, May 25, 2011
Nanetta: Paper Doll Studio
Nanetta: Paper Doll Studio: "Mini Mod is trying on wings, tiara and a red dress before she even gets her arms. She is standing across from her blank twin. She hardly se..."


Paper Doll Studio
 Mini Mod is trying on wings, tiara and a red dress before she even gets her arms. She is standing across from her blank twin. She hardly seems to notice. If only I could say it was unusul for my workspace to be this cluttered.
 A little assembly line of doll clothes customizing lies before the odd shadow that is cast by my laptop. These clothes are held onto the doll with magnets.
 Scissors and Sharpies are always close at hand, regardless of what I am working on. The orange Fiskars are reasonably priced and handy for precise trimming and cutting.
I especially like the double-tip Sharpie seen above. It has a regular tip and a fine tip. I edge with the former and detail with the latter.
X-acto knife, needle tool, more pens and tiny clothespins encircle the itty bitty fashions - all at the ready to help make each piece unique. Boxes of minutia are everywhere.

Plotting Mini. Silhouettes on a computer screen represent cutting lines for my Klic-n-Kut Maxx Digital cutter. You can see Mini Mod's parts, including alternative ideas as in the different stands. Reasearch tells me there is no right way. Many artists have innovated different ways to make their dolls stand. I ended up using the oval design - the simplest one.
Mini Mod's design includes a face stencil. You can see the cut-out area as white. This makes it easy to reproduce her features by hand. Check out her guitar. It is made of six pieces! What is the loopy thing and all the circles? The circles are tiny washers to ease movement of the paper joints. I cut many at a time, because they are so easy to lose. The loopy thing is an unfinished leash for a pet yet undesigned. Any suggestions?

Plotting Mini. Silhouettes on a computer screen represent cutting lines for my Klic-n-Kut Maxx Digital cutter. You can see Mini Mod's parts, including alternative ideas as in the different stands. Reasearch tells me there is no right way. Many artists have innovated different ways to make their dolls stand. I ended up using the oval design - the simplest one.
Mini Mod's design includes a face stencil. You can see the cut-out area as white. This makes it easy to reproduce her features by hand. Check out her guitar. It is made of six pieces! What is the loopy thing and all the circles? The circles are tiny washers to ease movement of the paper joints. I cut many at a time, because they are so easy to lose. The loopy thing is an unfinished leash for a pet yet undesigned. Any suggestions?
Paper Doll Poses
 Posing for photographs to be used in designing paper dolls has a few requirements. The most important consideration is the silhouette or outline your body will make. A good pose is one where the arms are away from the body as above. I prefer this as it makes a nice form for sleeves and shows off the waist.
 The face is at a 3/4 view, which is a flattering view for nearly everyone. I have designed several dolls in profile. A close-up is helpful in getting every fine detail of the face.
 This model of yesteryear has an inspiring profile. She is a timeless and classic beauty. Were I using her for a paper doll, I would trim the hair from the neck to give the neck more style and make it easier to design necklines and hats.
Lucy's main pose is nearly ideal for me. Her legs are separated at the knee, making for a strong stance and feminine pose. Her hands are delicate, shoulders straight, waist defined and the expression on her face - that really sells it. Notice in both paper dolls how the shoulders are bare and the base outfit - shorts or lingerie are tight-fitting to allow the best building of clothes on the model.
The alternative pose is very popular. Not only are hands on the hips a sturdy pose, but it allows for the doll to hold items in front of her. However, it is not one of my favorites. I like to see the hands.

Dita is personification of the ideal feminine form and this pose would be perfect if her arms were posed another way. As for the body, I love the way she is standing, the waist is nipped in with the corset and her legs are fantastic. Look at the lines of her body against the background. The simpler the backdrop, the easier it is to visualize a cut-out.

Dita is personification of the ideal feminine form and this pose would be perfect if her arms were posed another way. As for the body, I love the way she is standing, the waist is nipped in with the corset and her legs are fantastic. Look at the lines of her body against the background. The simpler the backdrop, the easier it is to visualize a cut-out.
When posing for a paper doll, keep in mind the shoes, hair and accessories. Would a doll of you wear heels, flats or cowboy boots? Are you known for wearing hats? Do you play an instrument, have a hobby or dig stripey tights? What kinds of clothes would you wear? Would your wardrobe be realistic, fantastic or casual and glamorous? Are you a Lucy or a Dita?
Wednesday, December 8, 2010
Fairy Flyers
Fairy Flyers are miniature paper mobiles that are strung on wires and affixed with a magnet so they can go anywhere a magnet goes. I hang them from my metal work lamps. If you want to hang them from somewhere that does not have a metal surface, (such as a lampshade), you can place another magnet behind the flyer magnet to hold it in place, with the lampshade in between. I bought 100 magnetic clasps years ago. They were not secure for jewelry and being the magnet hoarder I am, could not discard them. They work perfectly for my little fairies as the figures are lightweight.
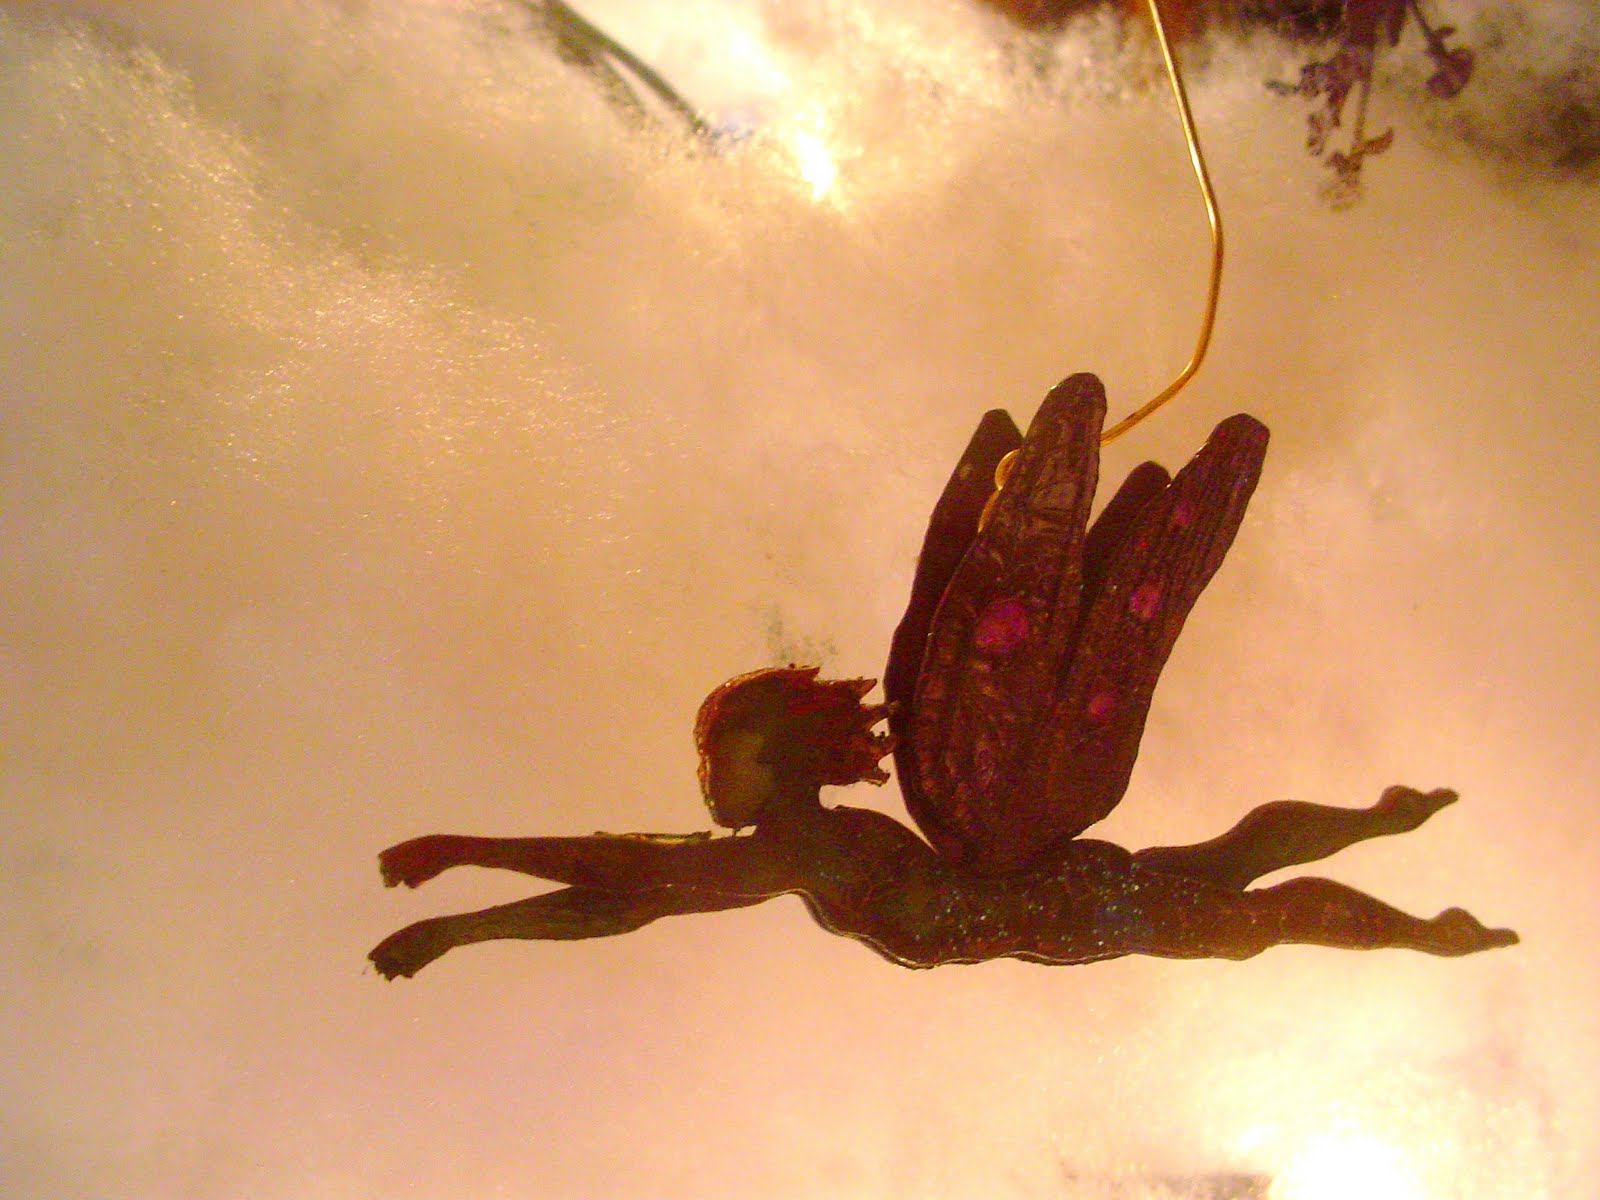 This little lady is a design from my book, Silhouette Style. She is cut from Yupo paper and colored with alcohol inks. She is glazed with a paper glaze. When dry, details are painted with translucent iridescent paint, glazed again and sprinkled with glitter. When the glaze is completely dry, the fairy is glued together. Her body is actually four pieces. Her wings are two pieces, treated with a crackle glaze.
 Shot in front of fiber-fill synthetic batting and twinkle lights, this violet fairy flyer seems to be on her way lightly. This one utilized a new hanger design. The hanger is hidden between the wings. For some reason, it threw off the balance of the fairy and she went into a nosedive. She gets a pretty glass flower belt and the problem is solved. Well, for this one. Now back to the drawing board on the hanger....
 Violet is also the palette for this tiny girl. She is a little over 2" tall. The figures start out white. I drop alcohol ink on the surface. It dries unevenly, which I encourage by touching it with a brush as it is drying. I spatter alcohol onto the dried ink and it makes little bleached variations that I enhance with the iridescant paint. Her skirt is trimmed with a coarse silk ribbon.
 I can't seem to remove this shot, so let's talk about the wire. I found that bending the wire is more interesting and effects the way the fairies turn. I put fishing swivels on some of them to give them a nice spin.
 Orange and sunshine yellow combine for vibrant color splashes. She is not glazed. If you look closely, you can see the variegation in the wings. Her dress is embellished with the tiniest pearl sequins I have ever seen, and teeny hologram stickers from Dillons, of all places.
Monday, November 8, 2010
Paper Dolls: Minni Mod

Minni Mod, wardrobe and case.
Introducing Minni Mod. She is an original jointed paper doll, standing 5", though she thinks she is taller. She is actually made of a new plastic paper that makes her durable and lightly washable.
Her wardrobe is made of patterned paper - oh! the patterns. Minni likes earthy tones, reds and especially green. She has a unique style, but doesn't fancy much glitter. You can see a sampling of her wardrobe spilling out of her little red and white polka dot case.

Here's Minni's poster. She poses with her guitar. It goes everywhere with her. She also has a pair of purple pearl fairy wings for the times when she feels a touch of whimsy.

Here she is - ready for the stage. She wears her favorite red hat and polka dot dress. Minni Mod has a magnetic wardrobe. She and her clothes are illustrated, crafted and embellished by hand. Many outfits are detailed with ribbon and other trims.
The fun thing is, you can also design your own fashions with blanks or get more outfits that will fit her.
Minni is able to be gently dressed and posed, but is an art doll and not for small children. Will she come home to you?
Wednesday, October 27, 2010
Shameless Last Minute Promo: Get Painted!

It occurs to me that Halloween is only days away and I could be painting people!
If you want to do a painting party, book it now. I am only doing one or two.
Here is CeCe with a painted necklace. The jewel in the center is adhered to the skin and stayed on a long time. The design is a root necklace. Blood droplets are enhanced with red acrylic stones. She stopped people in their tracks. She frightened at least one. We weren't even trying!
I can paint one or ten, with a 4 hour block. Contact me through Facebook for details. I can do pretty, spooky or pretty spooky. My blacklight paint is awesome.
I use professional paints, both water based and temporary tattoo body paints. I don't do logos or cartoons and will help you interpret your idea, at my discretion. These are one-of-a-kind designs from out of my head.
Consider:
painted on masks - so much more comfortable - with "jewels" or metallic paint
lacy white patterns - glow bright blue under a black light
the undead - glowing ghoul faces and hands, skeletal or decaying
bruised and battered - look beat up good, act scrappy
florals - freaky vines or pretty flowers
old and in the way - caution - you may resemble an older relative - very scary
in stitches - laugh all you want, it won't hurt - farmer's tan encouraged
mod - which once meant modern, but now means retro - think peace sign
jewelry - necklaces, bracelets, anklets
tattoo - a heart, saucy mermaid, fairy, names on scrolls
bald and beautiful - nothing says freaky like a face on the back of a head
Wishing you a safe and happy Halloween!
Monday, October 25, 2010
Introducing: YUPO

YUPO is a polypropylene sheet that looks and acts like paper, but uses no trees and is 100% recyclable. I think it is awesome. It is used in the printing and packaging industry. Artists discovered it as an excellent surface for watercolor techniques.
I have worked with YUPO for about 6 hours total. I have only just begun to experiment. This thin, sturdy, waterproof material is ideal for miniature cutting, because it enables me to cut accurately. It is so smooth. It's like buttah....
The tiny keys above are cut with my Klic-n-Kut electronic cutter and painted with alcohol inks. The alcohol inks by Adirondack are permanent, unless you put them in contact with alcohol or a similar solvent. What is amazing is a build-up of bronze-colored ink on each side of the key makes it look like a real key to scale. I add just a touch of blue or slate so it doesn't look too new. I accidentally sat on a couple, and they snapped back into shape. I am in love. I should note that items I bent that were untreated creased and stayed that way.

Yupo and alcohol inks are used here in a wash. I did use alcohol, sparingly, to remove pigment as well as thin it. See how the lips are built up and lifted of color. The hue is brighter each time it is applied. However, as in all watercolor brush techniques, there is the possibility of saturating and pooling the color beneath. It is a sweet dance of which I allowed the underlying surface to lead. The result is a loose style of color layering.

I am getting requests for miniature items for cards and encouragement to try dollhouse and doll scale items. Scale can be a fun exploration. Notice how the tiniest model distorted. I don't know why. Buckles are fun to use on dolls, cards, packages, and ribbons. The key is a blank. What a difference from the first photo!

Had I corrected this photo, you would see the brilliance of color on the butterfly wings. The color is magenta and violet. The satin-y look is from a pearl version of the ink. The dots are pearl and the veins are done by dragging a brush from one end of the wing to the other. That's it. The ink and the surface do the rest. Again, I am using a loose style and unconcerned about symmetry. Sometimes the ink built up gets sticky. I matted it down with glitter. Of course I did.
Subscribe to:
Posts (Atom)