Pages

Showing posts with label yupo. Show all posts

Thursday, August 11, 2011

Flower Clips

Flower blanks, fresh from cutting with my KNK Digital cutting system, these floral pieces are designed on my computer screen, then sent to the cutter for precision cutting. Notice the different sizes of the same design. This creates a larger variety of the pieces. I can mix up motifs. I cut many, many pieces before I begin the coloring process. There is something satisfying about a whole stack of blanks.
Color brings the petals and leaves to life. This shot shows some experimentation with metallics, particularly the large fern. The colorant is alcohol ink, applied with a dropper, then finished with a brush to make sure the edges are covered. In the far right is a floral element with a little more detail. These dashed lines are cut into the surface in a "pounce" line. Ink settles in, adding detail. Unlike my cherry blossoms, these florals are fantastical. Once my stack is finished, they assemble by what is in front of me in a kind of ordered chaos. I love the little buds you see poking out here and there. Each flower is finished with a clip. Originally designed for hair ornaments, they are being clipped onto clothing, headbands and hats.

Monday, July 25, 2011

Blue Fairy and Friends

A fairy blowing a kiss is my newest fanciful being. She is painted with alcohol inks applied with a dropper and finished with a brush. The sheen is Jo Sonya's iridescent blue, following the lines of the ink patterns.


You can see the difference in this photo. When the ink is overpainted with the iridescence it creates multiple light effects. In bright light, it is light colored. In less light, the brilliance of the blue comes through. These ladies would be great where they would catch the light, but as any art piece, direct sunlight is never a good idea if you want to preserve the original color.
A green fairy is painted with ink only. I will be going over the surface with iridescence, not necessarily the same color.
This fairy allows for beads or flowers to be hung from her hand and from the tiny hole in her wing fronds, evident in the middle photo. The fairies will be made singular and as mobile elements.

Thursday, July 21, 2011

Cherry Blossoms

Ah, to dream days of cherry blossoms. As a heat wave sears the country, set your thoughts on light breezes and delicate flowers.
Above, you can see the shimmer of pearl ink, tinted with pink. Red Iridescent Jo Sonya's velvet matte paint adds detail and additional sheen.
The cherry blossom is a double flower, assembled without glue. It takes a bit of patience to push the centers through all the holes and requires tweezers or a needle tool. The end result is worth it.
These are the pieces that make the blossom. This flower has holes for use in a mobile. The blanks here look mod in white against all the color of the background. The spidery center goes on top of the flower. The double center gets curled up and threaded through all the holes - up to four. Two centers hold everything in place.

This view shows a blank assembled prototype. It is made of synthetic paper called Yupo. I am offering the finished design in blanks and digital files in my Etsy store. You can color them with alcohol inks, watercolor, markers and Sharpies. Blanks come with or without holes in sets of three.


Tuesday, July 19, 2011

Did Someone Say Pink?

My first installation at Tanya's Soup Kitchen included mobiles and floral hair clips. One of the first comments was, "Save me a pink one". I was not about to announce that there were the brightest reds, the juiciest oranges and the sweetest greens, but alas - no pink.
Just in time, I received new ink colors. The first to be opened were these vibrant shades. I designed a new flower, which utilizes dashed lines to establish detail. The ink settles along these lines. It is especially evident in the center, where the ink has pooled and dried darker.
The photo above illustrates the edge treatment. I saturate a brush with ink and run it over all the edges so the white is covered. Details always make a difference.
The ink in this photo has just been applied. Ranger's alcohol inks and Yupo were made for each other. Yupo is synthetic paper. The inks come in a dropper bottle. It is amazing how far .5 fl. oz. will go! I drop ink onto the cut flower and allow it to set for a variegated, watercolor effect. Other colors will be added to fill in the white. The predominate colors are: Wild Plum and Raspberry.
A unique feature of this combination of media is that once the ink is dry, it is permanent, but if I add more color, alcohol or the blending solution, I can continue to manipulate the surface. The blue shimmer in the background is red/blue mica powder added to a previous flower. I use Yupo beneath my projects, because I don't want to waste a drop of these beautiful inks. I use the sheets for paintings, bookmarks and cards.
Oh, and the pink flowers will be showing up soon at Tanya's Soup Kitchen. In the meantime, there is a burst of twirling colors already there.

Monday, June 6, 2011

Soiled Dove Puppet


This puppet is made of Yupo, with Yupo Octopus for the dress. The dress is three pieces: dress, neck ruffle and sleeve ruffles. The Octopus has a smooth top surface that allows for fine detail. I drew with Prismacolor marker and Sharpie. The back of Octopus is the adhesive quality of micro suction cups. The clothes stick to the puppet like magic.

Not the clearest photo here, but it shows the puppet undressed. You can see the structure of her body. This soiled dove is made of a rigid sheet of Yupo fused to the Octopus. This way, all the pieces are sticky on the back and there is no hardware for the joints. This gal ended up getting smaller hands. I also am doing test shots to see what backgrounds I like. The green floral here softens the overall look.


This is a mat of weeded, cut puppet pieces for my puppet.
There are right and left multiple hands with varying gestures. The weird poofy shapes will be feathered trim for her hat.

Although it was nice to avoid eyelets and brads, moving the pieces around was laborious. As my ultimate goal is to have her move, I decided to go back to hardware. She is much easier to handle when she is together.

Through my research, I found a technique where the puppet is jointed with the eyelet and brad method, but the top layer has no holes, covering the top of the brad, giving a smooth look. I am going to try this.


Thursday, June 2, 2011

Little Bird

This little retro style bird is a new design, shown here made of Yupo. It has a little hole for hanging with a length of fishing line. I made a mobile and drew wild designs on several. The simplicity of white works too.


A flock of big-eyed birds land on my pen tab. They are prototypes trying to get the hanging hole placed correctly. I cut new designs in miniature to conserve material. I often cut 10 or more to get them right.


This view shows my cutting software screen. The eye detail is connected by a thin line to the bird body. The biggest challenge for me is getting the tail to fit snugly onto the body. The red areas you see are cut lines. They are a different color than the outline because they will be cut before the outer areas in black. Along with this issue, when the size of the bird changes the scale must change, but the width of the wing slit must stay the same. This is because the width of the paper doesn't change. Likewise, the tail slot must be adjusted.


Friday, May 27, 2011

Yupo Octopus Cameo


First of all - What is Yupo? Yupo is a synthetic paper. It is water resistant, sturdy, easy to cut and a good medium for acrylic, watercolor, alcohol ink and more. Here I am using it blank.


What is Yupo Octopus? It is a new product just released. It is a sticky-backed version of Yupo. The adhesive quality is wonderful for layering, making stencils, great for paper dolls, window art and more. I have barely begun to experiment.


Above, you can see a bad cut not worth weeding. It shows one layer of the cameo. There are five layers in all. Each layer is stacked to create a special effect. The negative space shows the cameo has been removed from the sheet. I often got mixed up in designing as it requires some backwards thinking.


The great thing about the Octopus is that it can be instantly adhered to the previous layer easily. Why is it called "Octopus"? Because the stick-to-it quality is not adhesive at all, but microscopic suction cups. I have been sticking pieces of it all over to see what it will stick to!


This is the cameo, unlit. As you can see, it appears opaque.


Light behind the cameo creates a soft, three-dimensional effect. I think I will use her on a night light. I am so pleased with my first successful cameo. Oooh! Wouldn't she be pretty on a window? I am going to design some roses for her.


Wednesday, December 8, 2010

Fairy Flyers

Fairy Flyers are miniature paper mobiles that are strung on wires and affixed with a magnet so they can go anywhere a magnet goes. I hang them from my metal work lamps. If you want to hang them from somewhere that does not have a metal surface, (such as a lampshade), you can place another magnet behind the flyer magnet to hold it in place, with the lampshade in between. I bought 100 magnetic clasps years ago. They were not secure for jewelry and being the magnet hoarder I am, could not discard them. They work perfectly for my little fairies as the figures are lightweight.

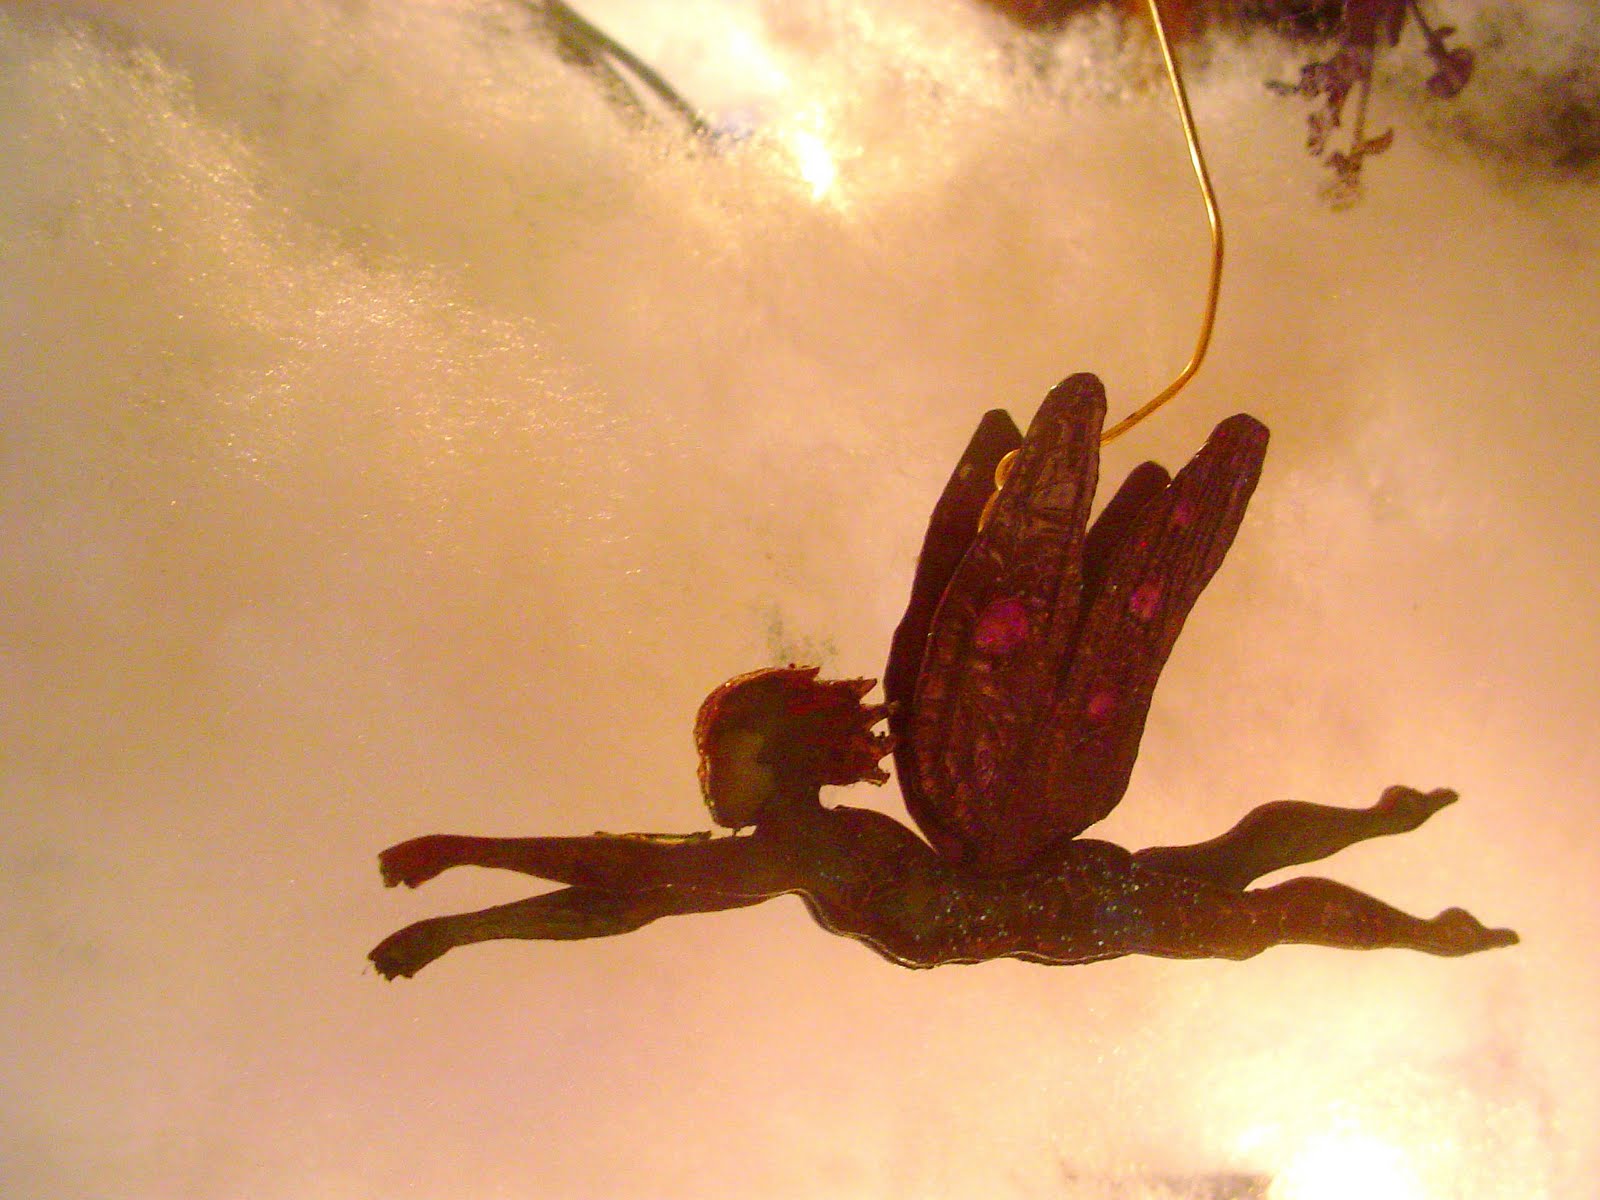
This little lady is a design from my book, Silhouette Style. She is cut from Yupo paper and colored with alcohol inks. She is glazed with a paper glaze. When dry, details are painted with translucent iridescent paint, glazed again and sprinkled with glitter. When the glaze is completely dry, the fairy is glued together. Her body is actually four pieces. Her wings are two pieces, treated with a crackle glaze.

Shot in front of fiber-fill synthetic batting and twinkle lights, this violet fairy flyer seems to be on her way lightly. This one utilized a new hanger design. The hanger is hidden between the wings. For some reason, it threw off the balance of the fairy and she went into a nosedive. She gets a pretty glass flower belt and the problem is solved. Well, for this one. Now back to the drawing board on the hanger....

Violet is also the palette for this tiny girl. She is a little over 2" tall. The figures start out white. I drop alcohol ink on the surface. It dries unevenly, which I encourage by touching it with a brush as it is drying. I spatter alcohol onto the dried ink and it makes little bleached variations that I enhance with the iridescant paint. Her skirt is trimmed with a coarse silk ribbon.

I can't seem to remove this shot, so let's talk about the wire. I found that bending the wire is more interesting and effects the way the fairies turn. I put fishing swivels on some of them to give them a nice spin.

Orange and sunshine yellow combine for vibrant color splashes. She is not glazed. If you look closely, you can see the variegation in the wings. Her dress is embellished with the tiniest pearl sequins I have ever seen, and teeny hologram stickers from Dillons, of all places.


Monday, October 25, 2010

Introducing: YUPO


YUPO is a polypropylene sheet that looks and acts like paper, but uses no trees and is 100% recyclable. I think it is awesome. It is used in the printing and packaging industry. Artists discovered it as an excellent surface for watercolor techniques.

I have worked with YUPO for about 6 hours total. I have only just begun to experiment. This thin, sturdy, waterproof material is ideal for miniature cutting, because it enables me to cut accurately. It is so smooth. It's like buttah....

The tiny keys above are cut with my Klic-n-Kut electronic cutter and painted with alcohol inks. The alcohol inks by Adirondack are permanent, unless you put them in contact with alcohol or a similar solvent. What is amazing is a build-up of bronze-colored ink on each side of the key makes it look like a real key to scale. I add just a touch of blue or slate so it doesn't look too new. I accidentally sat on a couple, and they snapped back into shape. I am in love. I should note that items I bent that were untreated creased and stayed that way.


Yupo and alcohol inks are used here in a wash. I did use alcohol, sparingly, to remove pigment as well as thin it. See how the lips are built up and lifted of color. The hue is brighter each time it is applied. However, as in all watercolor brush techniques, there is the possibility of saturating and pooling the color beneath. It is a sweet dance of which I allowed the underlying surface to lead. The result is a loose style of color layering.


I am getting requests for miniature items for cards and encouragement to try dollhouse and doll scale items. Scale can be a fun exploration. Notice how the tiniest model distorted. I don't know why. Buckles are fun to use on dolls, cards, packages, and ribbons. The key is a blank. What a difference from the first photo!


Had I corrected this photo, you would see the brilliance of color on the butterfly wings. The color is magenta and violet. The satin-y look is from a pearl version of the ink. The dots are pearl and the veins are done by dragging a brush from one end of the wing to the other. That's it. The ink and the surface do the rest. Again, I am using a loose style and unconcerned about symmetry. Sometimes the ink built up gets sticky. I matted it down with glitter. Of course I did.